It only takes a few minutes to setup VPN on router, and the benefits of encrypting all the devices on your network are useful. This step-by-step guide will show you why it’s important and how you can do it on your own WiFi router today.
Key Takeaways
- A VPN-enabled router provides enhanced security by encrypting your entire WiFi network. It lets you exceed the simultaneous connection limits imposed by VPN services.
- Not all routers are compatible with VPN configurations. You’ll likely need a 3rd party router that supports OpenVPN.
- For manual router setup, access your router’s control panel, locate the VPN client, create a new profile using your VPN credentials, and activate the VPN.
- When using a VPN router, consider disabling it when not needed, bookmark the router login page, be aware of the VPN kill switch, and troubleshoot any potential GPS issues if any.
Most people tend to assume that configuring a VPN on a router is a highly complex task that requires specialized skills, so, they steer away from attempting it.
But, as you will see, this isn’t true.
Sure, it’s not as straightforward as installing a dedicated VPN app on your phone, but this guide will give you easy-to-follow setup instructions.
Specifically, we’re going to cover:
Before you decide to install a VPN on your router, let’s cover the advantages and disadvantages of doing so.
Note: Some of the links in this article may be affiliate links, which means that at no extra cost to you, I may be compensated if you choose to use one of the services listed. I only recommend what I personally have used, and I appreciate your support!
Advantages vs Disadvantages | VPN Router
There are some good reasons for wanting to install a VPN on your router, but there are also some disadvantages.
Before you take the time, effort and money to setup a VPN router, let’s make sure this is really what you want to do here.
Why You Might Want a VPN on Your Router
- Security and privacy are guaranteed at all times: When using computer and mobile phone apps, you need to manually turn on the virtual private network every time you go online. On the other hand, once your VPN is configured on your router it will always be active 24/7. The always-on connection will encrypt all your devices including those from your Internet of Things (IoT) devices.
- Protects even the unsupported devices in your network: Not all routers or internet devices are VPN compatible. Think Smart TVs, streaming media players, gaming consoles, and IoT devices such as smart speakers and security cameras. This is bad news because these devices can be utilized to compromise your online privacy and security. However, once you set up a VPN on your router, every other device that connects to that router will have that extra layer of security.
- Protect unlimited devices with just a single license: Some companies like Surfshark allow unlimited simultaneous connections, but most others impose a limit. ExpressVPN allows only five (5) simultaneous connections while NordVPN allows seven (7). Since a router counts as only one connection, you can run unlimited devices through it on a single account.
- It will save you time and effort: Do you really want to go installing a VPN app on your wife’s phone, your kids’ phones, their tablets, etc. etc.? And then teach them how to use it? Of course not! All this can be avoided by setting up the VPN on a router.
Disadvantages of a VPN Router
- Customizing settings or changing servers is hard: Routers don’t have a dedicated user interface and instead have to be accessed through another device such as a PC or mobile phone. This makes it a tad bit harder to perform basic VPN functions like switching between servers or changing to a different connection protocol.
- Routers may limit a VPN’s encryption power: All top virtual private network services support multiple connection protocols that combine with solid encryption standards to ensure that hackers and online spies cannot decrypt your internet traffic. OpenVPN has historically been the most trusted VPN protocol but the Wireguard protocol is quickly overtaking it. Unfortunately, some older network devices may not support it. Instead, they use the outdated PPTP and L2TP/IPSec protocols which only guarantee basic encryption.
- Encryption Only Happens at the Router: When using a VPN on the router, your internet traffic is unencrypted while it moves from your device to the network. It will also be unencrypted while it moves from the router back to your device. This leaves a small opportunity for somebody to steal your data or spy on you by infiltrating your network. Make sure that your network is secure and that you only allow trusted devices to connect.
- Blocks some incoming connections – One of the ways a VPN protects you is by blocking unauthorized connection requests to your network. However, not all blocked connections are harmful and unfortunately, it’s more difficult to allow these connections through when the encryption is performed on your router as opposed to when it’s on your device.
- The installation process is longer: Luckily, I will be giving you a step-by-step guide on how to set up a VPN on your router, and therefore, the installation process is not something you have to worry about.
Compatibility: Will My Router Work with a VPN?
Unfortunately, not every internet and WiFi network can be configured with a virtual private network. Both your router and VPN provider must support the necessary protocols.
For example, in most cases, you won’t be able to install a VPN on a router given to you by your cable or internet service provider.
You will need to have your own, 3rd-party router that connects to one of the LAN ports on your modem.
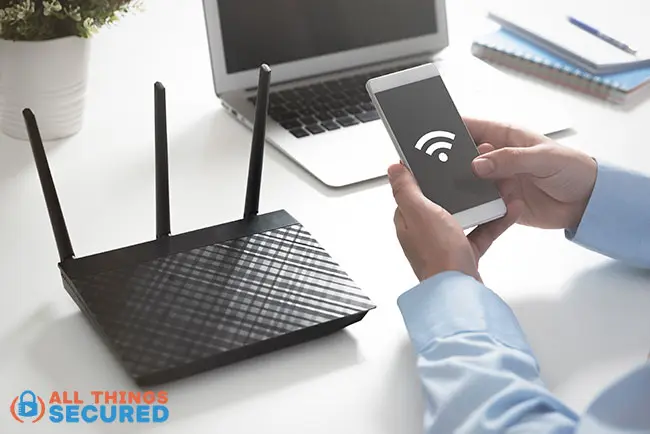
You can check compatibility by either looking through the user manual for a “VPN client” configuration, or you can do a quick search online.
Most quality WiFi routers from brands such as Asus, Netgear, and Linksys will work just fine. These network devices are specifically designed to maintain a number of VPN connections.
If you know that your router is compatible, go ahead and jump down to the step-by-step guide. If you’re stuck with an older or incompatible device, however, let’s walk through a couple of options.
Alternatives to Manually Configuring a VPN for Routers
If you’ve searched the user manual or scoured the internet and found that your particular router isn’t ready to accept a VPN configuration, not all hope is lost.
You still have a couple of options left to work through. You can:
Let’s look at both of these options individually.
Option 1: “Flash” Your Router
“Flashing” a router is a fancy word to say “changing the operating system”. You’re replacing what came out of the box with an operating system that supports VPN configurations.
WARNING: Read Before Flashing
Flashing your router could break your device if not done properly. I only recommend you do this if you know what you’re doing or are using an older device.
Time needed: 15 minutes
To flash a router, you’ll want to follow these steps:
- Download a Compatible Firmware
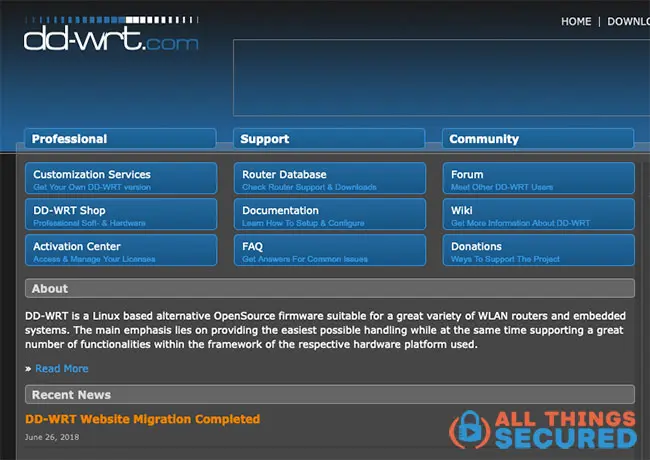
The most popular freeware developed for network routers is DD-WRT and Tomato. Choose the appropriate firmware version based on your router model and download it to your computer.
- Connect and Log Into Your Network
Connect to the router you wish to flash either via WiFi or direct Ethernet cable. Check the back or sides of the WiFi box for instructions on how to log in. In many cases, this will either be a URL (i.e. https://router.brand.com) or an IP address (i.e. 192.168.1.1).
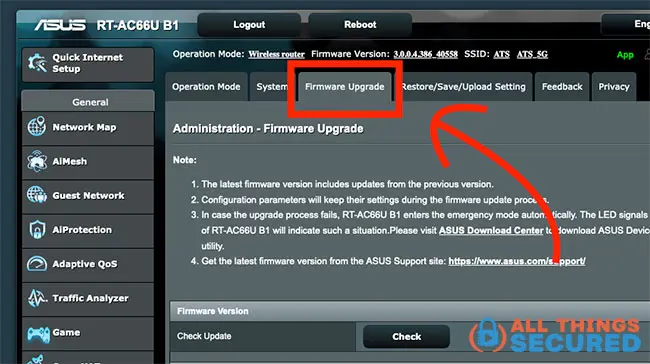
- Find “Firmware Upgrade” in the Administration Tab
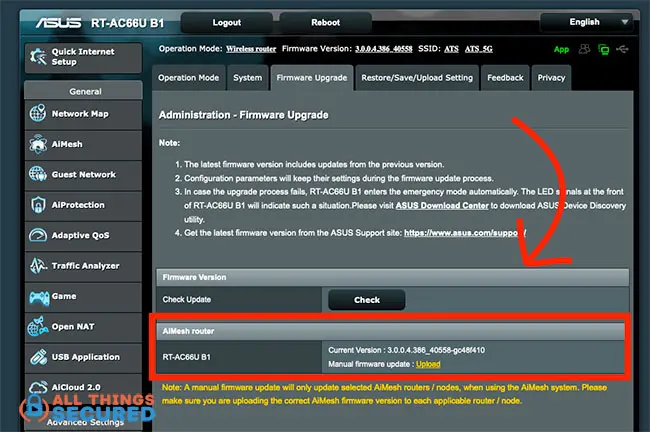
While every device is different, you’ll want to navigate to the administration tab and find the “Firmware Upgrade” section.
- Upload new Firmware and Restart
There will be a place for you to upload the file you downloaded from DD-WRT or Tomato. Upload the file and restart your router.
Once successfully flashed, when you log in to your network again, it will look completely different (because you’ve changed the operating system).
This new system will be ready to setup a VPN on a router.
Option 2: Purchase a Pre-Configured Router
If the idea of trying to configure a router or flash an existing device seems like just too much…
…don’t worry.
You’re not the only one to feel that way.
Did you know that you can buy what’s known as a “pre-configured router”?
These are routers that have been created specifically for VPN use. They have the right hardware to handle encryption seamlessly and they are already pre-flashed with a VPN of your choice.
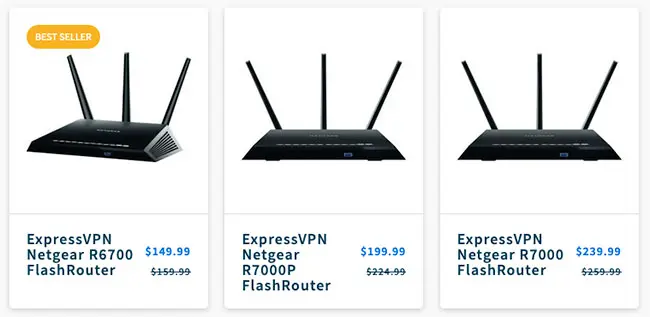
When you check out the FlashRouters website, which is what I recommend, there are plenty available which work with the most popular VPN services and can fit most any budget.
You could choose from:
- ExpressVPN-configured Netgear R6700
- NordVPN-configured Linksys WRT3200
- Surfshark-configured Netgear R6400
Some VPN providers, such as ExpressVPN, have dedicated router VPN software that you can upload to the router you already have, so it might be worth checking out such router VPNs before buying a whole new router.
How to Install a VPN on Router
While we’re going to walk you step-by-step through this setup process below, it’s sometimes easier to see it in action.
Be sure to subscribe to the All Things Secured YouTube channel!
The installation process varies for different types of routers but they all follow the same basic steps.
- Access your router’s administration menu.
- Open the VPN client.
- Configure your VPN connection.
- Check whether the VPN connection has been established.
For this review, I’m going to show you how to set up a VPN on an ASUS router with stock firmware. And while we’re showing ExpressVPN in this tutorial, you can do pretty much the same thing with any of these popular VPNs for routers.
Step 1: Access your Router’s Control Panel
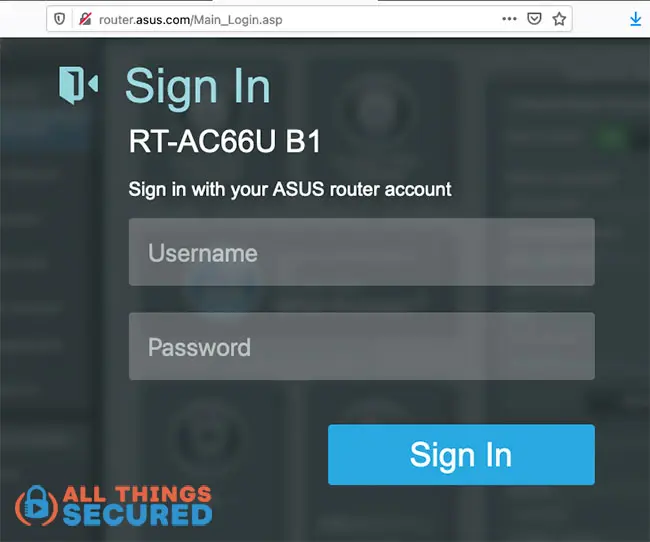
Enter your router’s IP address on your browser’s URL bar and open it.
Most routers use 192.168.0.1 or 192.168.1.1 or a custom URL, but in either case, it will be displayed on the back or bottom of the WiFi box. This will take you to the login page. Consult the manual to determine the default username and password if needed.
Step 2: Find the VPN Client
On my Asus router, the VPN tab is visible from the menu on the left side. At this point, you want to find the VPN Client tab.
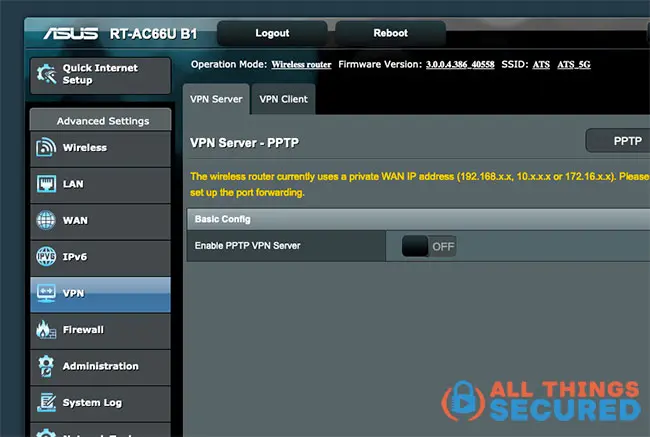
Clicking on this tab will give you the option to Add Profile.
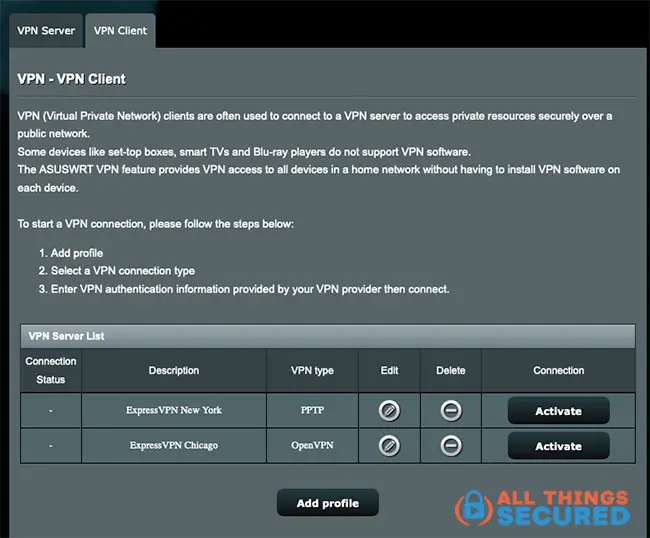
You can see in the above example that I’ve already added two VPN profiles, but for the sake of this VPN router tutorial, let’s detail exactly how to do this.
Step 3: Add a New VPN Profile on the Router
If I wanted to, I could add any existing VPN server profile on my router from here, however, I just clicked the Add profile button and chose between OpenVPN, PPTP, or L2TP.
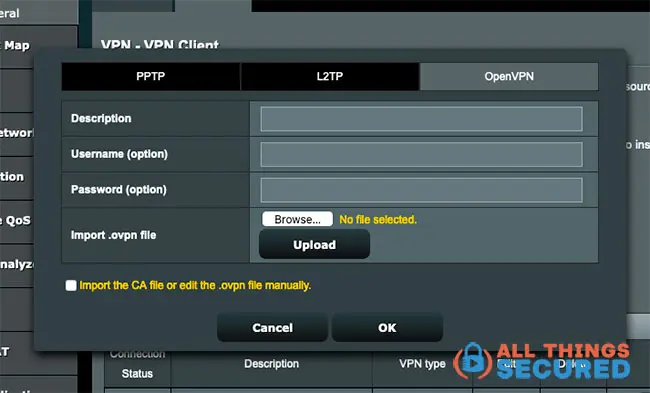
When dealing with OpenVPN (seen above), you’ll need to copy/paste the specific username and password from your VPN service and upload a specific .ovpn file they give you.
To do this, log in to your VPN account and look for the “Setup” section where they list all their apps and setup tutorials. On most websites, you’re looking for “Manual Setup”.
In my ExpressVPN account, it looks like this:
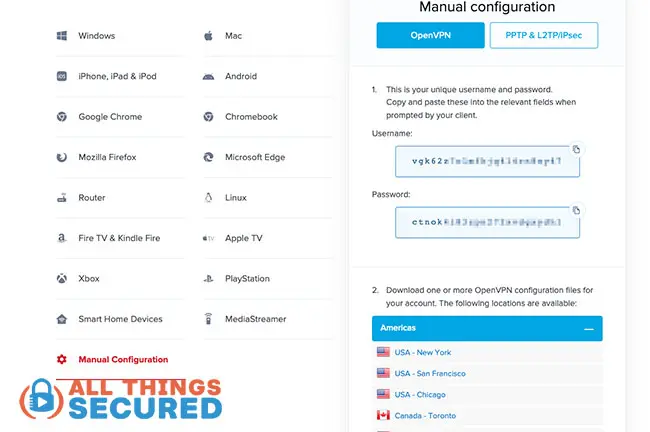
You can see above that ExpressVPN gives me a username and password (which isn’t the same as my account credentials). Below that, I can choose a specific server to download the .ovpn file.
Uploading this file to the WiFi router will configure the VPN settings for OpenVPN.
For PPTP, it’s almost the same, except instead of downloading a file, you can just copy/paste the server address given by your VPN company.
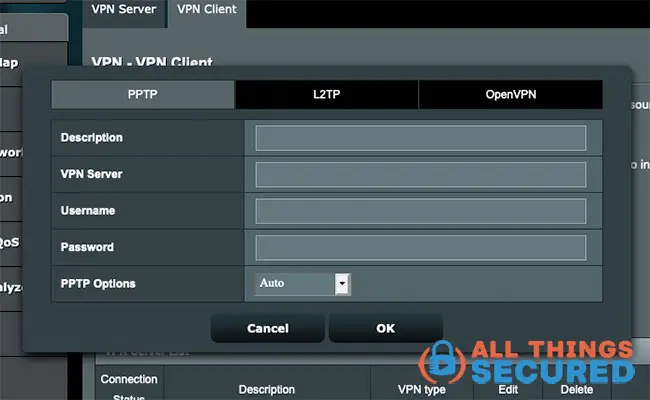
In both examples, the Description is whatever name you want to call this configuration.
Step 4: Activate the VPN Router Settings
At this point, you should see a new profile with whatever name you gave it.
Click Activate and in some cases, you’ll watch the router begin to connect to the server; in other cases, you’ll have to restart the to initiate the connection.
In either situation, you should receive confirmation of a successful connection with a visual or text cue (i.e. “Connection success” or a blue check mark);
Now, go type “What is my IP address” in Google to double-check the connection. If everything is done right, your IP should show the location of the server you setup and not your actual location.
Bonus Tip!
Create multiple profiles for different servers in different countries to make it easier to switch the next time you log into your router.
Tips for Using a VPN on Router
Having successfully setup a VPN on router, any device you connect through the network will be encrypted through the virtual private network server.
Here are a few things to remember as you move forward:
- Always ON? One of the advantages of a VPN for routers is that you can turn it on and forget about it. For some people, this is a good thing. If you don’t want to have your VPN “always on”, you’ll have to remember to log in and turn it off manually.
- Bookmark Your Router Login: If you plan to make changes to your server location or anything else related to the configuration, be sure to save the router login address as well as your login credentials. I recommend saving these in a good password manager app if you have one.
- Remember the Kill Switch: In some cases, the VPN on your router could be configured with a VPN kill switch. This means that if your server connection were to be disrupted, your entire internet connection would be cut. Remember this if you suddenly have problems with your network internet connection and can’t figure out why.
- Fix GPS Issues: If you run into a problem where a streaming service requires GPS location data instead of the IP address that your router provides, you’re going to need to do more. In some cases, such as bypassing YouTube TV location requirements, you’ll have to spoof the device location while also using a VPN on your router.


