Do you ever feel trapped by your iPhone’s location? When access to certain shows, apps, or geo-location-based games feel limited? In this tutorial, we’re going to explore exactly how you can change location on your iPhone to take back control of this personal data.
Turns out it’s simpler than you’d think. From VPNs to Apple ID tweaks and spoofing tools, I’ve tried it all and will guide you through what works.
By the end, you’ll be able to virtually transport your iPhone anywhere. Let’s dive in!
Why Change Your iPhone’s Location?
To start, let’s explore some of the most common reasons that you might push you toward changing your iPhone location:
- Hide your actual location: It’s unfair how all these nosy apps and websites are stalking your location 24/7, trying to bombard you with ads. Masking your real location will help you take control and remain anonymous to hackers and snoopers.
- Access geo-restricted content: While most of the time streaming services rely on a device’s IP address to determine location (which can easily be changed using a good VPN), there are others such as BBC, YouTube TV or even Hulu Live that want to check your actual GPS data. Location spoofing lets you bypass all of this regional censorship.
- Enjoy location-based apps and games: Bored of catching the same old Pokémon and matching with the same old faces on Tinder? Switch up your location and unlock a whole new world of endless possibilities.
- Get cheaper deals: Did you know that it’s possible to get cheaper deals on flights and hotel bookings by making vendors think you’re in a different location?
- Play pranks: You could send your friends snaps from fake locations while you’re on your couch and watch their reactions. Harmless fun!
Modify Your iPhone’s Location Using a VPN (IP address)
Want a quick and easy way to change your iPhone’s location? Just fire up a virtual private network.
You can be rolling with a fresh IP address in just a few seconds. Sure, VPNs have some limits. But for unblocking most geo-restrictions, they get the job done.
Let me walk you through the process of changing your iPhone location with a VPN using NordVPN. You can use any VPN of your choice.
- Get a NordVPN subscription.
- Install the NordVPN app from the app store.
- Launch the VPN app and log in using your credentials.
- Allow NordVPN to add VPN configuration to your iPhone.
- Pick your desired server location and wait for the VPN connection to be established.
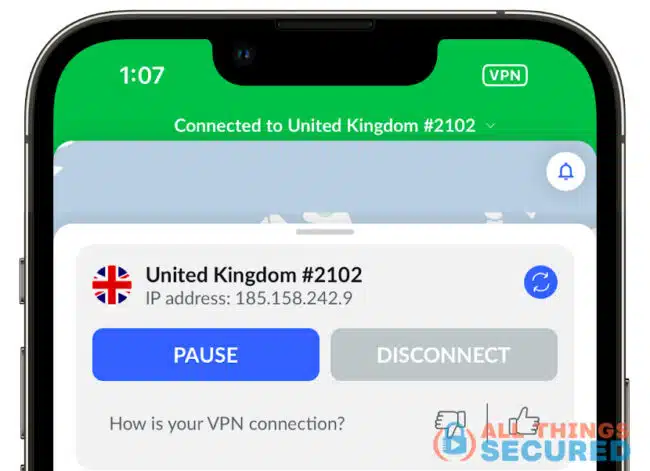
That’s it! Go ahead and look up your IP address. It should now reflect your new virtual location if you followed the steps correctly.
When VPNs Fall Short: Ineffectiveness in Altering Location
When it comes to altering your iPhone’s location, VPNs hit a dead end in a couple of scenarios:
- Downloading apps unavailable in your region: The app store serves you limited apps based on your region. A VPN won’t make any difference, as the region was already set when you created your Apple ID. To access those unavailable apps, you’ve got to permanently switch your Apple ID’s region in settings.
- Spoofing your GPS data: The main limitation of VPNs is that they can’t override your iPhone’s GPS data used by apps like Maps and Pokémon Go. This is because these apps rely on more than just IP addresses to determine your location. To outsmart them, you’ll need a more robust GPS spoofing app.
Two scenarios, two different approaches. Stick with me as I tackle each step by step!
How to Change Your iPhone’s Apple ID Region or Country?
First, let me walk you through the steps to changing your iPhone’s Apple ID region. This is for anyone who wants to download apps that are unavailable in their current location.
Important Note
Apple recommends you spend any remaining Apple ID balance and cancel all existing subscriptions before changing your region. Additionally, you’re only allowed to change your Apple ID region once every 90 days.
- Launch the Settings app on your iPhone.
- Tap on your name at the top to access Apple ID settings.
- Select “Media & Purchases” and then hit “View Account.”
- Choose “Country/Region” and tap change country or region.
- Pick your desired country or region from the list.
- Agree to the terms and conditions.
- Enter a valid payment method and billing address if prompted. Once done, click “Next.”
Success! You should now be able to access the entire app catalog for your new region.
How to Fake iPhone GPS Location (No Jailbreak)
You can play with the GPS data on a jailbroken iPhone without any third-party software via Cydia. However, jailbreaking an iPhone is a risky step that we don’t endorse.
Thankfully, many GPS spoofing tools now exist that don’t require jailbreak. My top pick? iMyFone AnyTo – a tool that works with all the AR games and dating apps tapping into your iPhone’s location services.
Here’s how you can fake GPS location on iPhone using iMyFone AnyTo:
- Connect your iPhone to a PC/Mac with a cable (no app on your mobile phone is required)
- Download and install the iMyFone AnyTo software on your PC/Mac.
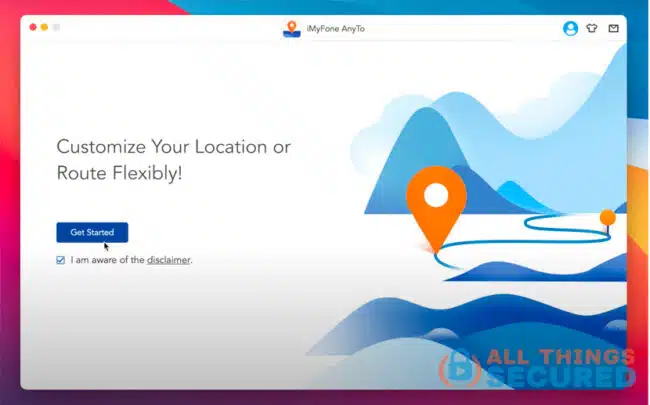
- Switch to the teleport option by clicking on the third icon in the top-left menu.
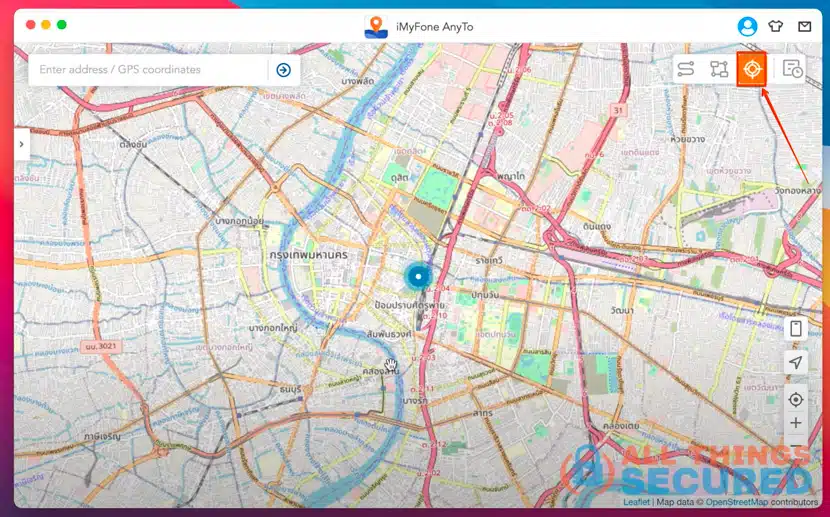
- Search for your targeted GPS coordinates in the search bar.
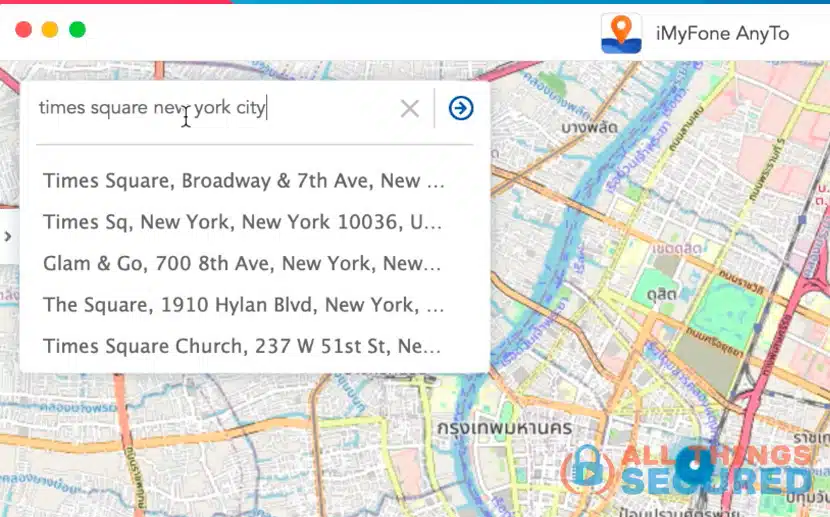
- Select the desired location and click “Move.”
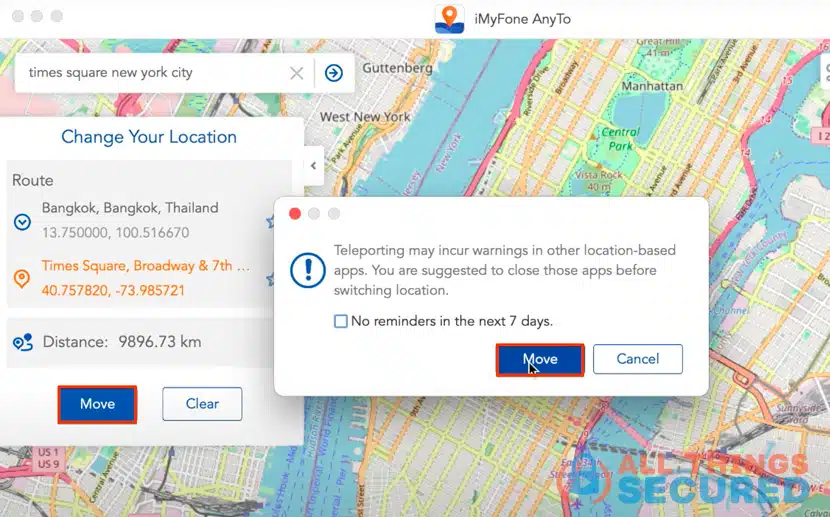
Ta-da! Your iPhone’s now rocking the location you picked. Want proof? Fire up Google Maps and see the change!
What’s interesting about iMyFone AnyTo is its ability to simulate movements like walking, cycling, or driving without moving an inch. Simply select the two-spot mode, set your starting and finish points on the map, and choose your preferred speed.
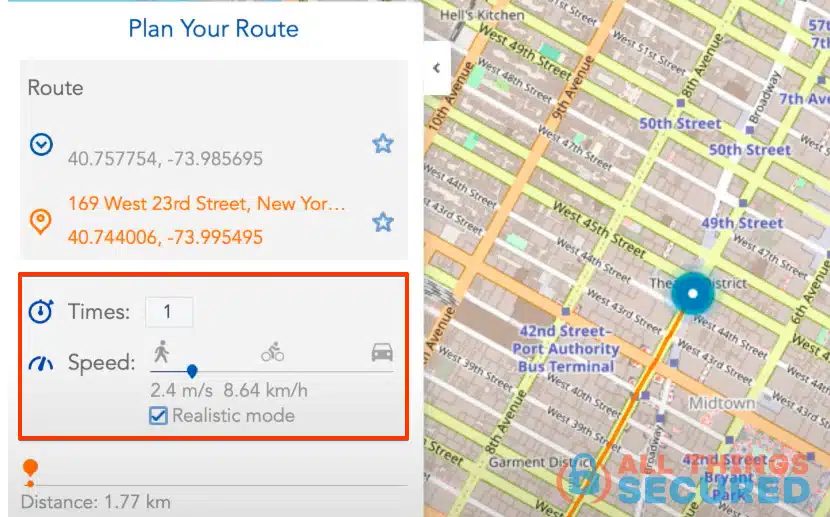
Moreover, iMyFone AnyTo stands out as one of the rare GPS spoofing tools, featuring a joystick. This lets you control your iPhone’s location in real-time using your PC’s keyboard, enhancing your AR gaming experience.
How to Turn Off Location on iPhone?
Using a VPN or a GPS spoofing tool is a solid method to alter your iPhone’s location. However, did you know that iPhones pack inbuilt location services settings allowing you to keep your location private but not necessarily change it?
- Launch your iPhone settings app.
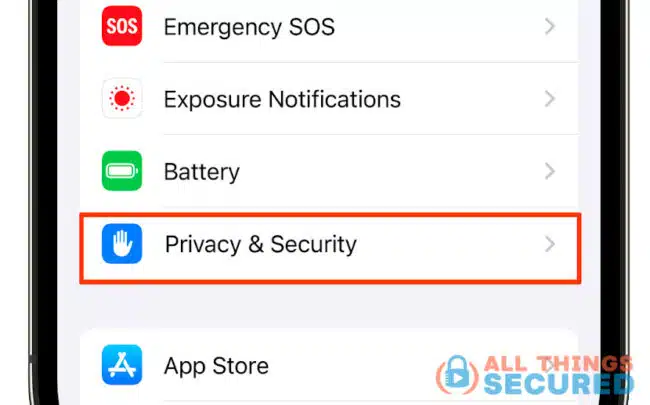
- Scroll down and choose “Privacy & Security.”
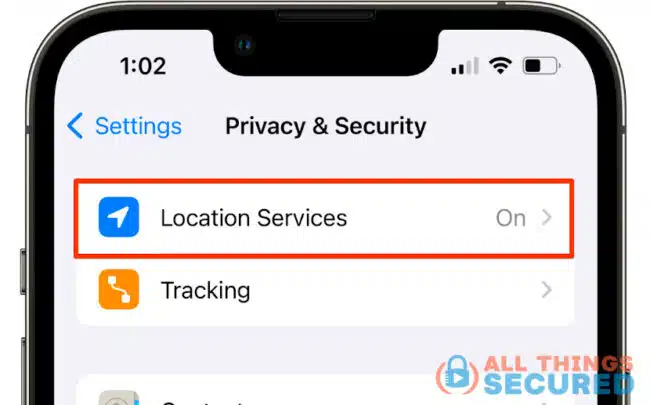
- Tap on “Location services.”
- Turn location services off. A confirmation pop-up will appear.
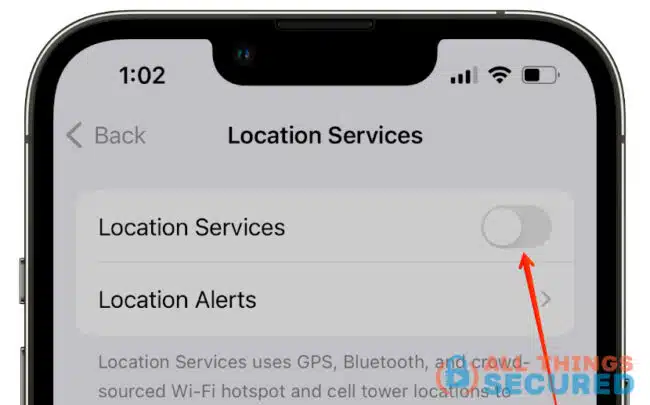
- Tap “Turn Off” to confirm. Your iPhone’s location services for all apps have been successfully deactivated.
You’ve got even more control within the iPhone’s location settings. To disable location services for specific apps, scroll through the list of apps using location services. Tap on the app you want to tweak.
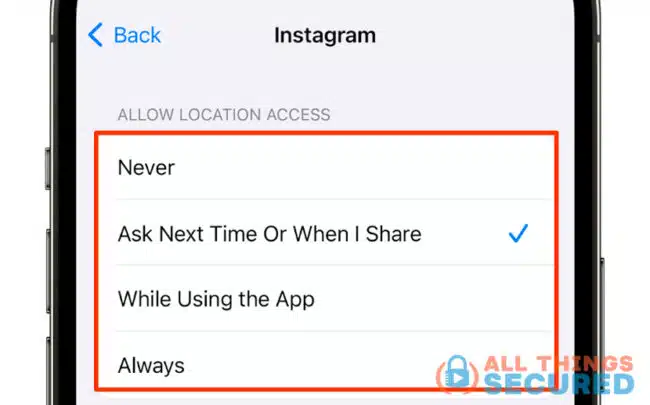
Choose one of the following options: “Never, Ask Next Time, While Using the App, or Always.”
Frequently Asked Questions
Let’s now answer some of the hottest questions related to changing the location on your iPhone.
Most free VPNs are capable of changing your iPhone’s virtual location by changing your IP adress. However, free VPNs usually come with limited IP addresses, bandwidth constraints, sluggish speeds, and a lack of security features. So opt for a reliable paid VPN if you want convenient location spoofing.
The Find My app utilizes your iPhone’s actual GPS coordinates, making a VPN ineffective. To make Find My iPhone show a different location, you’ll require a sophisticated location spoofer like iMyFone AnyTo.
In most cases, spoofing your iPhone’s location is legal if it’s done without harmful intent. However, using location spoofing for fraudulent activities like manipulating Apple app store pricing can lead to legal consequences. Yet, for personal use, like safeguarding privacy or unblocking content, it doesn’t raise significant concerns.
Bottom Line
There it is–your complete roadmap to changing your iPhone’s location!
We’ve covered it all: VPNs for minimal content unblocking and hardcore spoofers like AnyTo to play AR games and level up your Tinder game.
You now have the power to teleport your iPhone anywhere your heart desires. So what’s taking you so long? Start spoofing your location now. You get five free teleports when you sign up for the free trial.
